Bootstrap Checkbox Example
Introduction
From time to time the most basic details might probably become very critical-- especially as you get to need them. For instance precisely how do your site visitors connect with the web pages you create specifying a basic Boolean act-- simply just yes or no concerning a number of the questions you need to request, how they do consent to the terms and conditions or line up a few of the possible options they might possess. We often surpass this with no paying very much of an care to the component responsible for such activities still, the Bootstrap Checkbox Class is certainly a pretty serious element-- one our forms cannot in fact complete without.
Inside the current fourth version of the Bootstrap system we are offered with the
.form-check.form-check-label<div>.form-check.form-check-label<label><input>.form-check-inputWays to work with the Bootstrap checkbox:
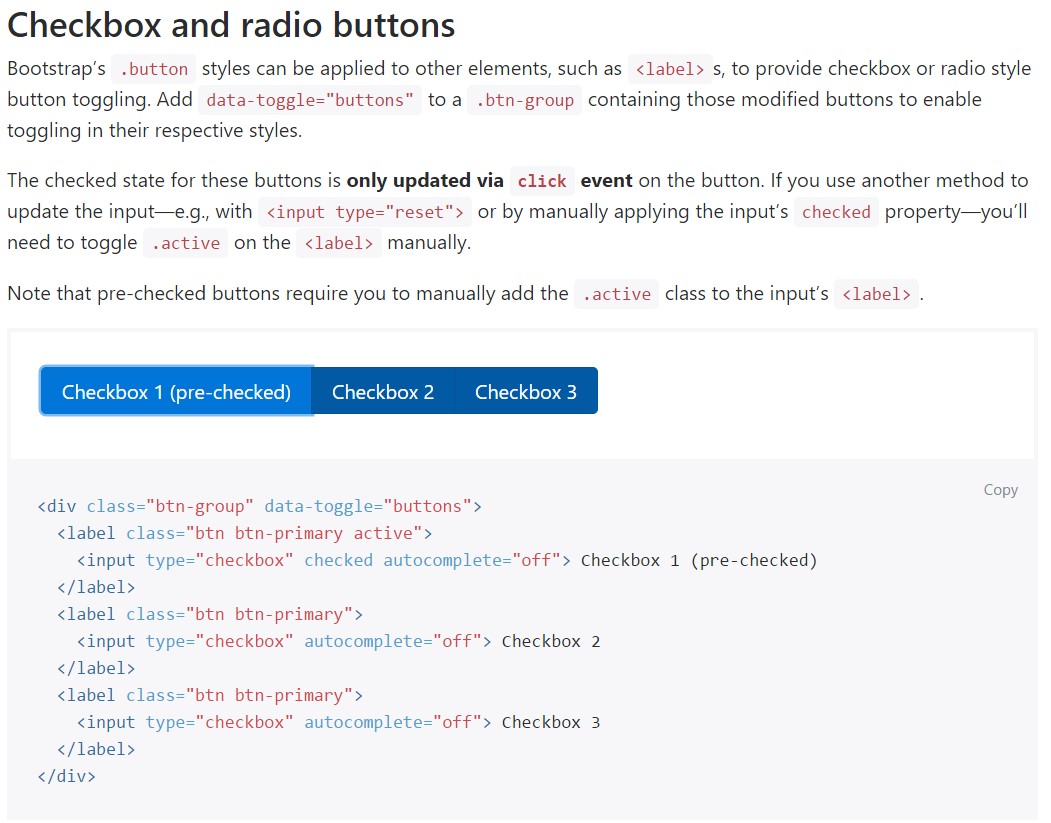
Bootstrap's
.button<label>data-toggle=" buttons".btn-group
<div class="btn-group" data-toggle="buttons">
  <label class="btn btn-primary active">
    <input type="checkbox" checked autocomplete="off"> Checkbox 1 (pre-checked)
  </label>
  <label class="btn btn-primary">
    <input type="checkbox" autocomplete="off"> Checkbox 2
  </label>
  <label class="btn btn-primary">
    <input type="checkbox" autocomplete="off"> Checkbox 3
  </label>
</div>
Sometimes we need to have the checkboxes to arrive inside our forms without the customer actually having the opportunity to have any type of practice clicking on them-- that is definitely where the disabled option appears.
To disable correctly a checkbox in Bootstrap 4 using the standard HTML attribute
disabledIn the case that you appreciate the idea and simply wish to do this you need to appoint the
.disabled.form-checkOne more situation
If applying checkboxes, wrap them in a
<label>.custom-control.custom-checkboxUtilize
.custom-control-input<input>Also put into action two
<span>.custom-control-indicator.custom-control-description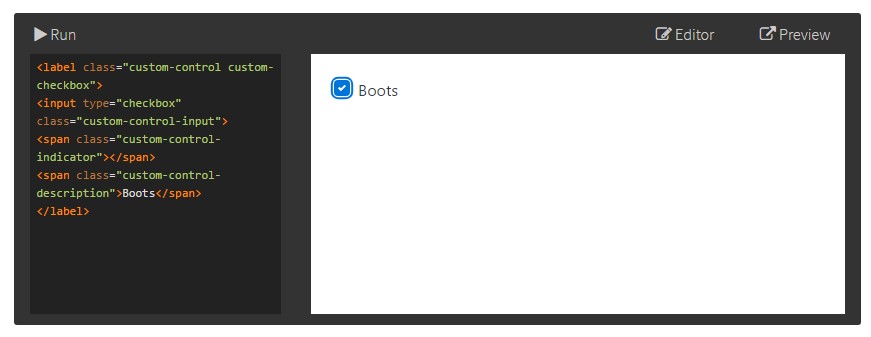
<label class="custom-control custom-checkbox">
<input type="checkbox" class="custom-control-input">
<span class="custom-control-indicator"></span>
<span class="custom-control-description">Boots</span>
</label>
Bootstrap Checkbox State forms
Default checkboxes and radios are improved upon with the help of
.form-checkThe disabled class is going to in addition light up the message coloration to help signify the input's state.
A brand new component for the Bootstrap edition 4 framework is the integrating of the so called custom-made form features. These are actually the similar elements we are knowing inside practicality although designated much more desirable and also with the Bootstrap approach. Using them you can certainly put in special excitement and individuality to your web content via just assigning a handful of extra classes to the commands you involve in your forms.
For you to utilize custom-made checkboxes wrap them inside a
<label>.custom-control.custom-checkbox<input>.custom-control-input<span>.custom-control-indicator.custom-control-descriptionFinal thoughts
That's basically all you need to complete in order to insert a checkbox feature within your Bootstrap 4 powered website and incorporate some custom-made flavor to it adding it a beautiful appeals. Right now all you ought to do is repeat the drill until you've reviewed all of the checkboxes needed are readily on the webpage.
Look at a couple of online video information regarding Bootstrap checkbox
Connected topics:
Bootstrap checkbox official records
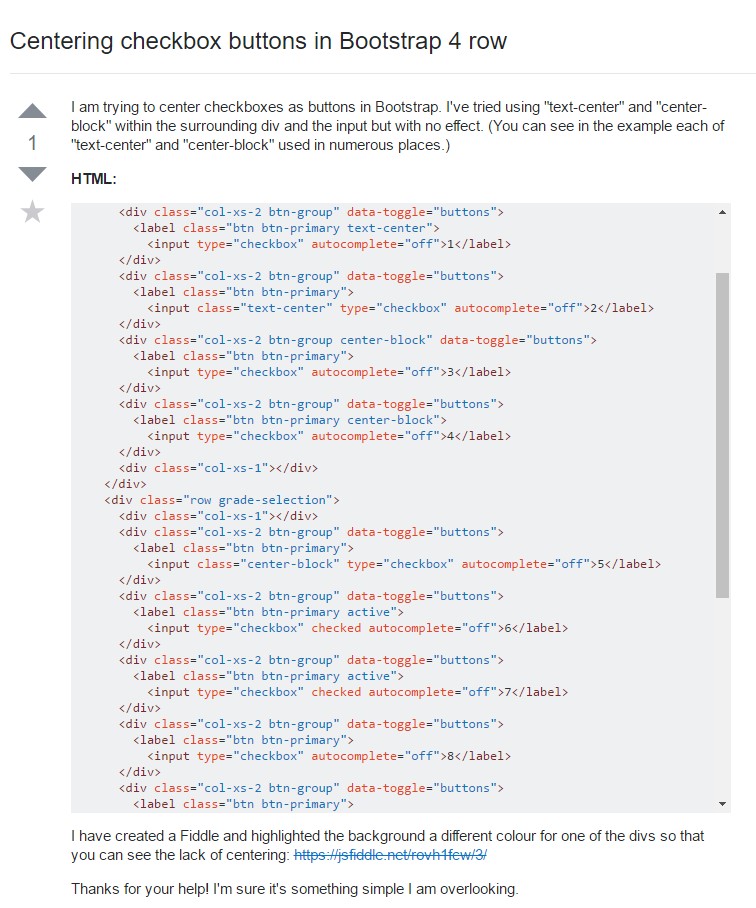
Centering checkbox buttons in Bootstrap 4 row
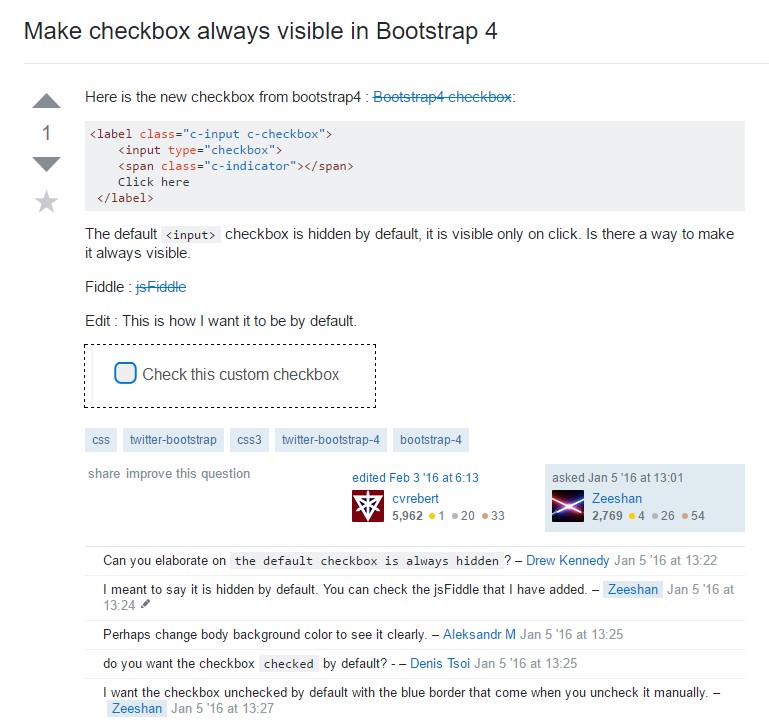
Make checkbox always visible in Bootstrap 4